Tutorial - Acoustical Measurement with the AcMus Software
Please note that the project was finalized in 2008 and the software has not been maintained since. The MacOS version has better chances of working; if you are unable to capture audio with AcMus, it is possible to do that in a different program and import the files in AcMus to perform the calculations.
This is a quick guide to measure and analyse acoustical environments using the AcMus software.
Before starting, please download the adequate version of AcMus to your platform at the downloads page and install it on your machine.
Introduction
The acoustic measurement and analysis process of a room results in a large amount of data, both retrieved and calculated. For this reason, the AcMus software allows data to be organized into hierarchical folders, each one with a specific purpose. The main folder types are:
-
 Project folder
(Project): represents the measurements of a room
Project folder
(Project): represents the measurements of a room
-
 Session folder
(Session): stores the measurements done on a specific period.
Session folder
(Session): stores the measurements done on a specific period.
-
 Set folder
(Set): stores the various repetitions done for a specific measurement take.
Set folder
(Set): stores the various repetitions done for a specific measurement take.
 Measurement take folder
(Measurement take): stores the take data (room response recording,
impulse response and calculated acoustic parameters).
Measurement take folder
(Measurement take): stores the take data (room response recording,
impulse response and calculated acoustic parameters).
-
 Signals folder
(Signals folder): stores the excitation signals played on the room (MLS or logarithmic scan).
Signals folder
(Signals folder): stores the excitation signals played on the room (MLS or logarithmic scan).
-
We describe below the process to create a measurement project and both perform and analyse a measurement.
Creating the project
When running AcMus for the first time, it is necessary to choose the directory on the filesystem where the project files are to be stored.

After that, the AcMus environment mais window is shown.
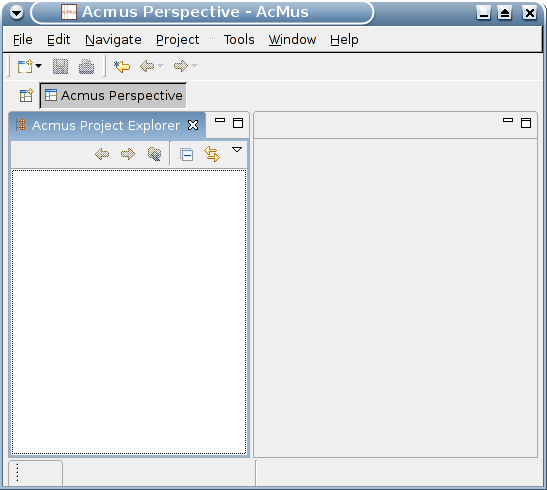
The first step is create a project. In order to do that, it is enough to select the Measurement Project on the File->New menu.

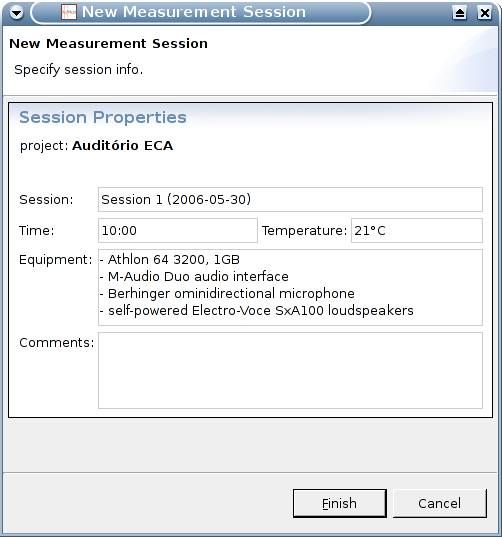
A wizard will guide the creation process, when some information may be associated with the project.
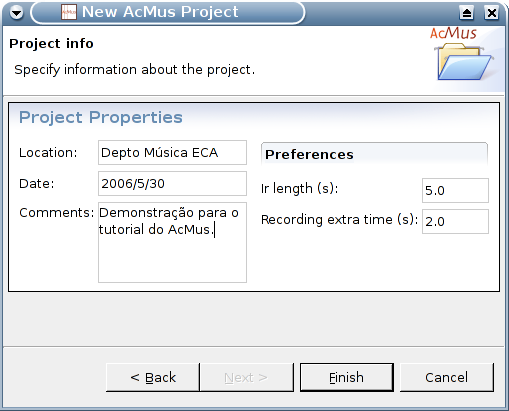
Ir length is the size of the impulse responses calculated on this project, Recording extra time is the wait time between the end of the excitation signal and the moment when the system stops recording the room response.
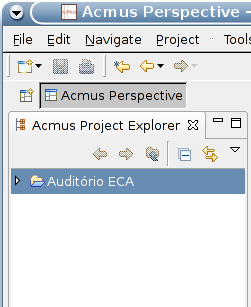
After creation, a folder named after the project is created on the AcMus Project Explorer panel.
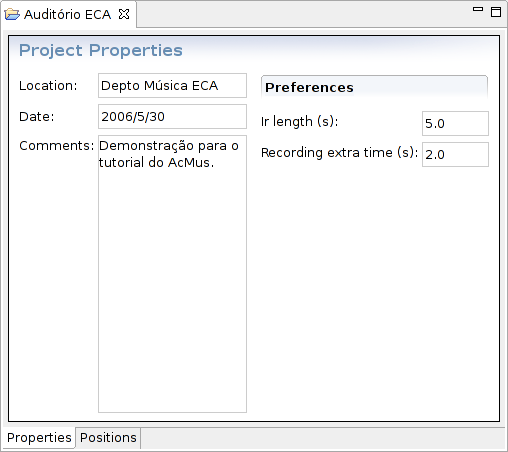
The project information may be accessed later on the properties editor, which may be opened by double-clicking on the project folder.
Room description
As an additional documentation, it is possible to bind the description of the measured room to a project. This is also done on the properties editor, on the Positions tab.
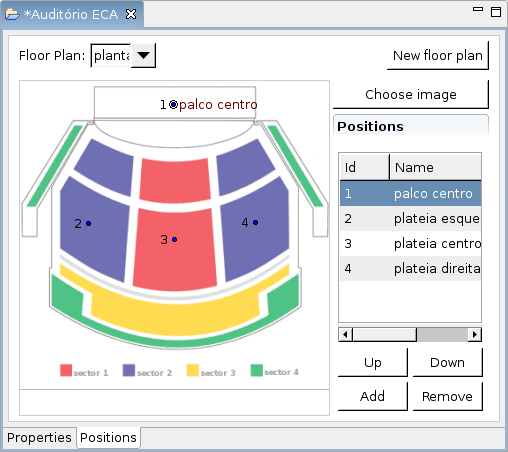
This editor makes it possible to bind blueprint images and mark named positions on top of these blueprints.
Important: do not forget to record these changes (File->Save menu).
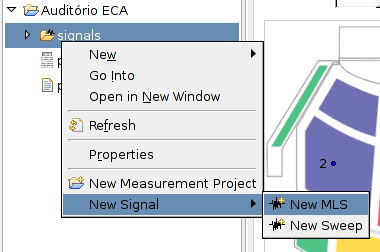
Signal creation
During a measurement, a computer-generated signal is reproduced by the loudspeaker. The Signals folder stores the generated signals for the project. To create a new signal, open the Signals folder context menu with a right-click (or, on MacOS, by holding the CTRL key while clicking) and select the New Signal->New MLS ou New Signal->New Sweep option. In this tutorial, we will use the Sweep signal.
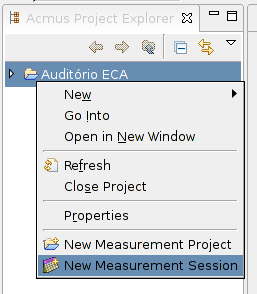
Session creation
The next step is creating a measurement session. Open the Project folder context menu and select New Measurement Session.
The session creation process is similar to the project creation process.
Measurement set creation
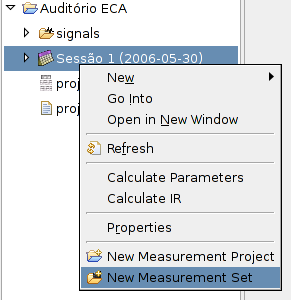
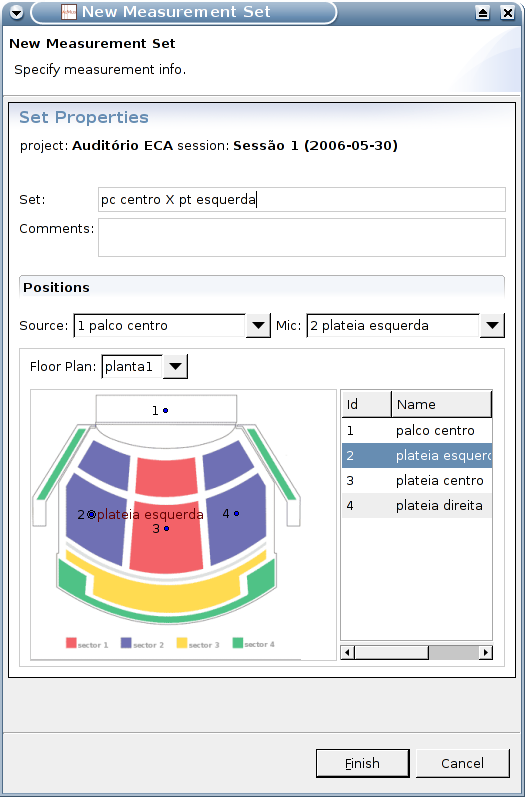
Within a session, one may create sets of measurement takes. A set groups together one or more takes made with a single microphone and loudspeaker positioning. To create a set, open the session context menu and select New Measurement Set.
It is possible to define the microphone and loudspeaker positions for this set.
Take creation
The measurement take folder stores data from a single measurement. To create a measurement, open a set folder context menu and select New Measurement.
Next, double-click the new take folder to open the measurement interface.
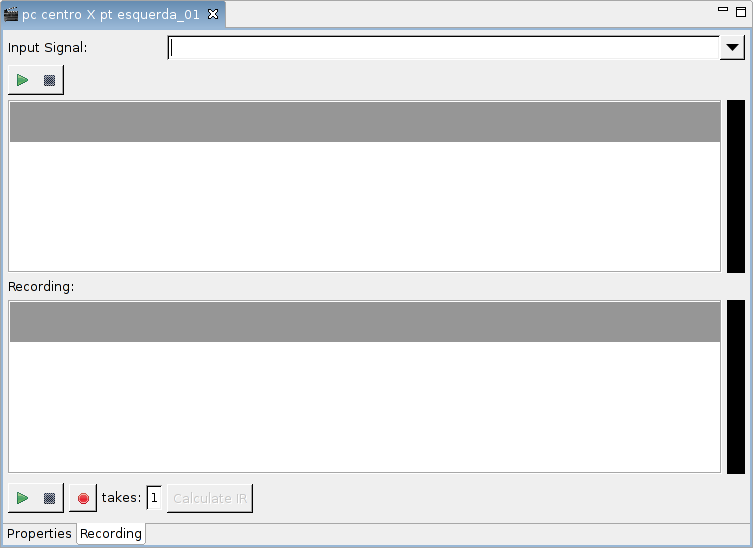
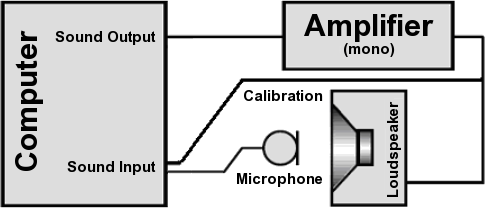
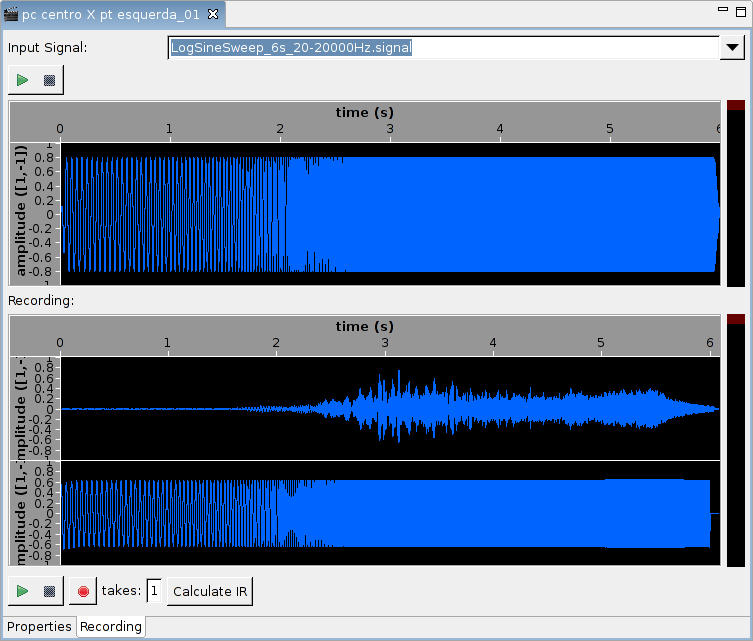
To perform the measurement, select a signa from Input Signal and click on the record button. The AcMus software reproduces the signal on the system's standard audio output and captures the system's standard recording line input. The left channel from the line in signal should be the signal from the microfone and the right channel should just be a looped-back connection to the output signal, as shown below.
The recording result will be similar to this:
To calculate the impulse response, click on Calculate IR. When calculation ends, a tab named Impulse Response will be created.
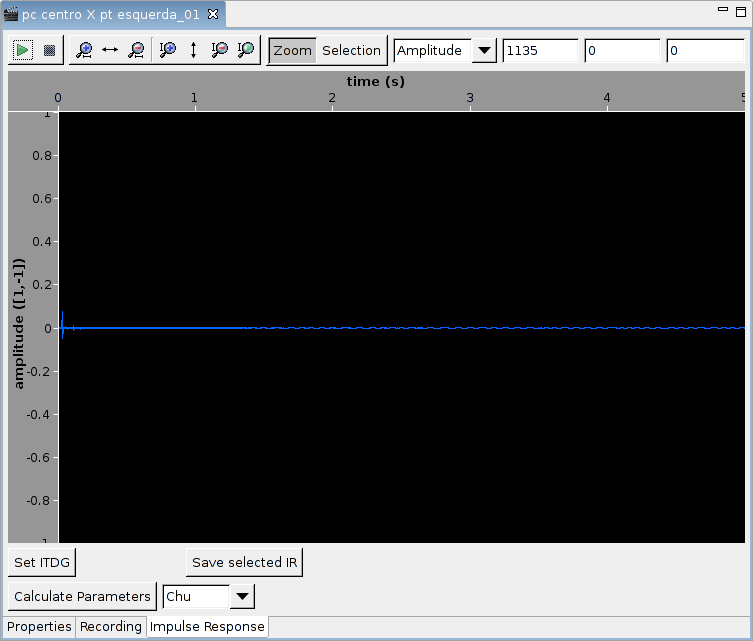
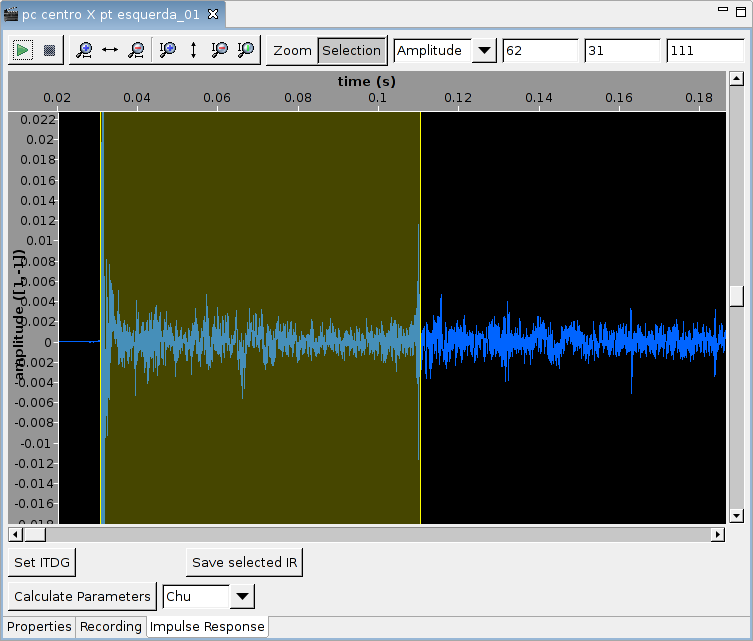
Use the zoom and selection tools to choose the ITDG parameter (this is optional).
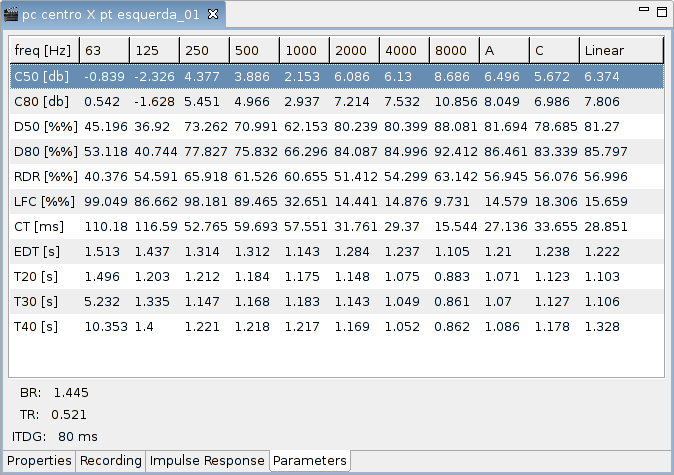
After that, click on Calculate Parameters. When calculations end, a tab named Parameters will be created.
- Parâmetros Subjetivos em Salas Destinadas à Prática Musical (Subjective parameters in rooms destined to musical practise) - in Portuguese.
- An Open-Source Platform for Musical Room Acoustics Research - in English, but touches the subject only lightly.
Review
This concludes the guide with the minimum steps to perform measurements with AcMus. The software offers other resources, to be covered on other tutorials.
In short, to perform a measurement, you should follow these steps:
- Create a project.
- Bind a blueprint of the room to the project and create measurement positionings (optional).
- Create a logarithmic scan
- Create a session.
- Create a set.
- Create a take.
- Choose the signal
- Click on Record.
- Click on Calculate IR.
- Move to the RI tab.
- Select the ITDG (optional).
- Click on the parameter calculation button.
- Move to the parameters tab.

Last update: April 2, 2008.